Setup n8n for free on Heroku
Nov 03 2021
Automation is a topic that fascinates me a lot. After hitting limits on free plans for Zapier as well as Integromat, I came across n8n. I was fascinated by the product and the fact that anyone can spin-up an instance of the software and start automating their day-to-day tasks.
If you are looking for something similar, then this guide will walk you through the steps to setup an instance with a click of a button.
Note: n8n has a cloud-hosted version you can use if you want to skip this setup.
Want more automation resources sent to your inbox? Join our newsletter.
Prerequisites
You will need:
- A Heroku account. Click here to register one.
- A GitHub repo to deploy the n8n instance on Heroku. You can use this 👉 1-click deploy button below to start the installation process.
- A cup of coffee for when you are building automations and freeing up your time
Getting started
Once you have your account setup on Heroku, click the deploy link to start the installation process. You will be brought to a setup screen looking like this:
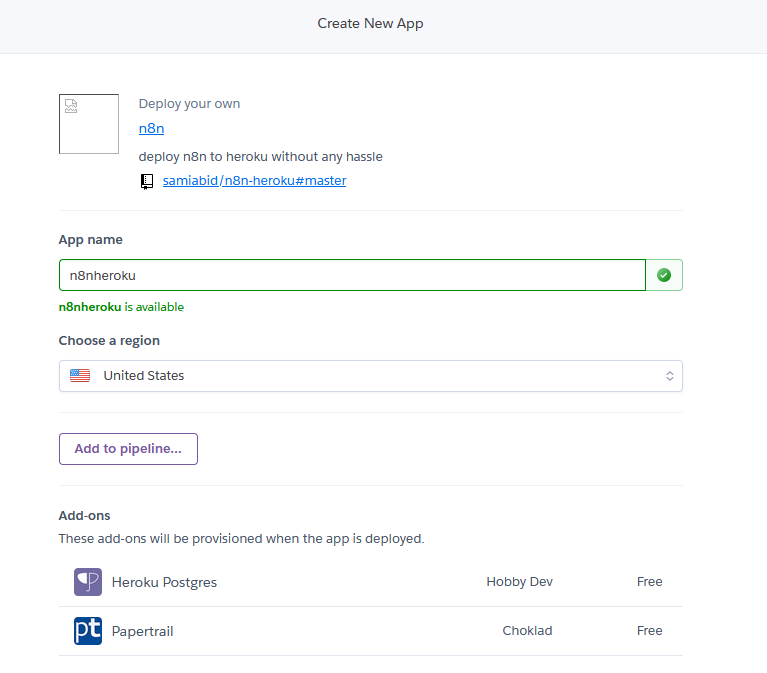
Configure a name for your app. Use something easy as this name will act as a domain name to access your app later. In this e.g n8nheroku will transform to https://n8nheroku.herokuapp.com/
Leave the rest of the settings from the above screenshot as it is.
We now need to configure the variables for the app, this involves setting up a username & password as well as enabling SSL encryption. Make sure it’s a strong password.
The screenshot below highlights the variables we need to setup or change:
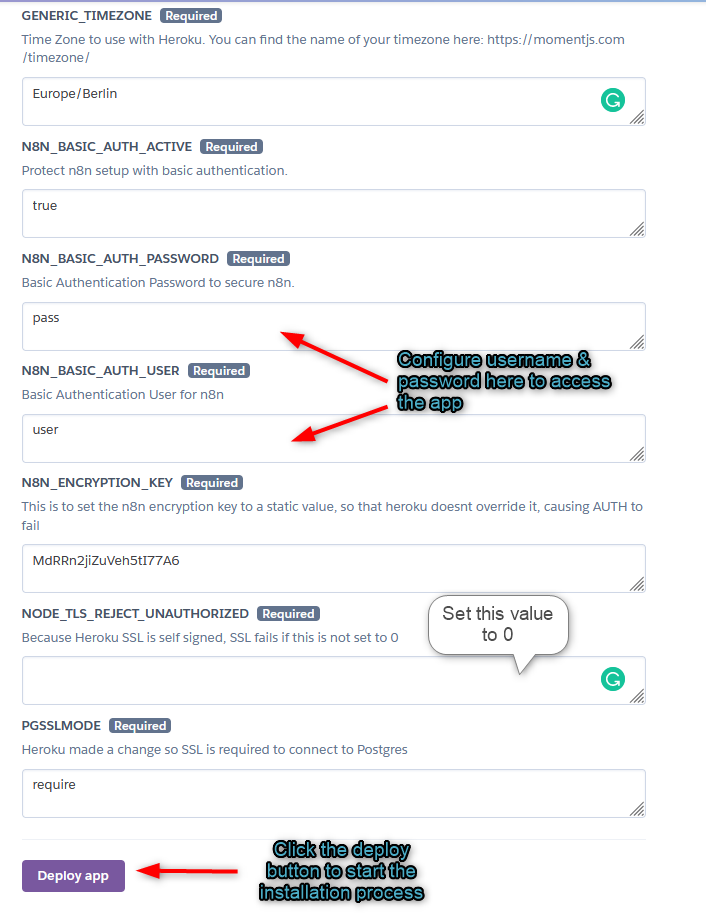
After setting up the variables, click on 'Deploy app' to start the installation process. This process will take a couple of minutes while the installation script is running.
As the installation is completed successfully, the 'Deploy to Heroku' text will turn green with a checkmark on the extreme right hand side of the screen. This is a confirmation that your deployment is now ready to be used.
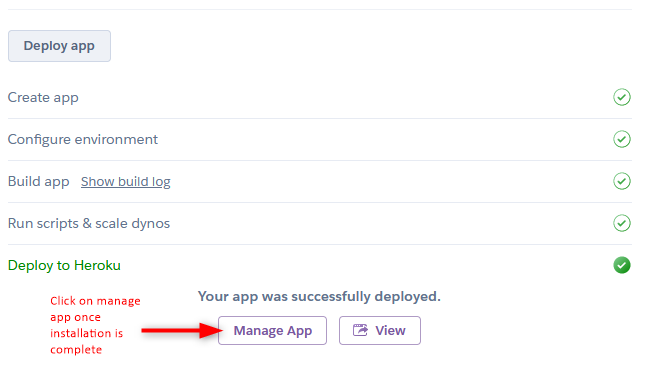
But before we start using the app, there's a few more configuration changes we need to make to ensure you have a smooth experience.
After clicking on the 'Manage App' screen:
- Click on 'Settings'
- Scroll down to 'Config Vars' and click 'Reveal Config Vars'
- Insert the two variables highlighted in the screenshot below. Basically it's your app name that we chose during the initial setup followed by .herokuapp.com/
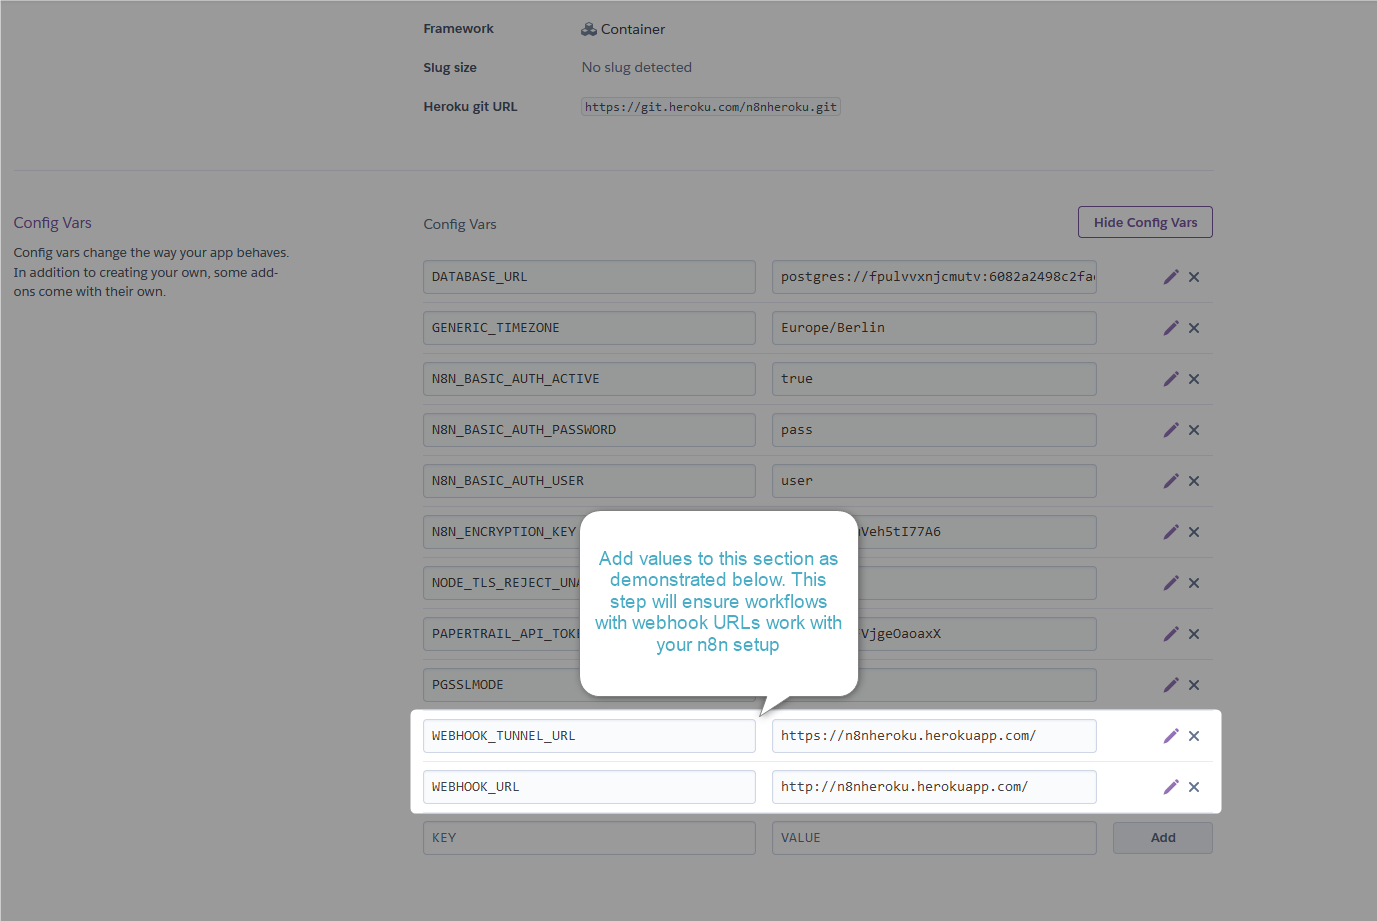
The reason to complete step number 4 is to ensure your automations can communicate with webhooks that require external triggers.
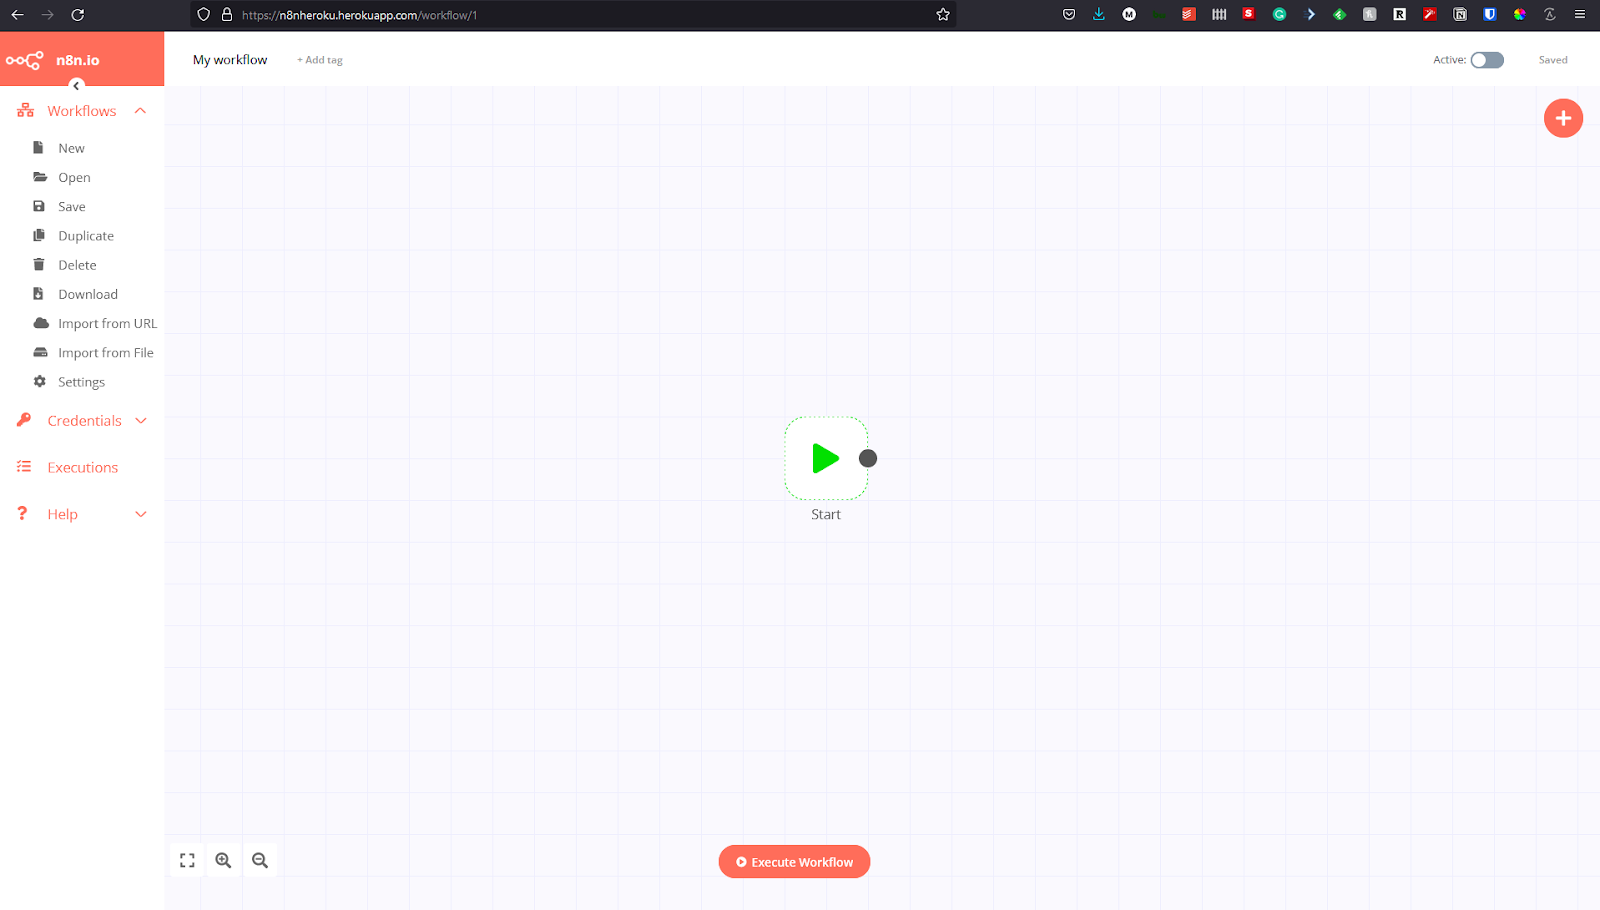
This was the last step of the configuration, we are now ready to start automating the mundane stuff with n8n. Scroll to the top of the page and click 'Open App'. Enter the username & password configured in the setup and you should be able to see a similar screen below:
To help you get started with automation, there are some great templates available on the n8n website, please visit https://n8n.io/workflows
Happy automating!
Need the help of an automation expert? Contact us now.
This guest post was written by Sami Abid a business systems and n8n expert
Ready to get started?
Tell me what you need and I'll get back to you right away.